Mosaic Overlay Crochet: The Technique I Thought Was Too Complicated
Three months ago, I wouldn’t have considered myself a mosaic crochet person.
I’d seen the stunning blankets and wall hangings people were making and immediately filed them into the category of “beautiful things created by people with far more crochet talent than I have.”
They looked impossibly complex.
Then I learned something that completely changed my mind.
Mosaic overlay crochet only requires three basic stitches:
- Chain
- Single Crochet
- Double Crochet
That’s it.
I honestly didn’t believe it at first.

How I Fell Down the Mosaic Rabbit Hole
I learned mosaic overlay crochet through a Facebook group run by Kari from Hooked by Kari. After seeing the projects people were making, I decided to give it a try.
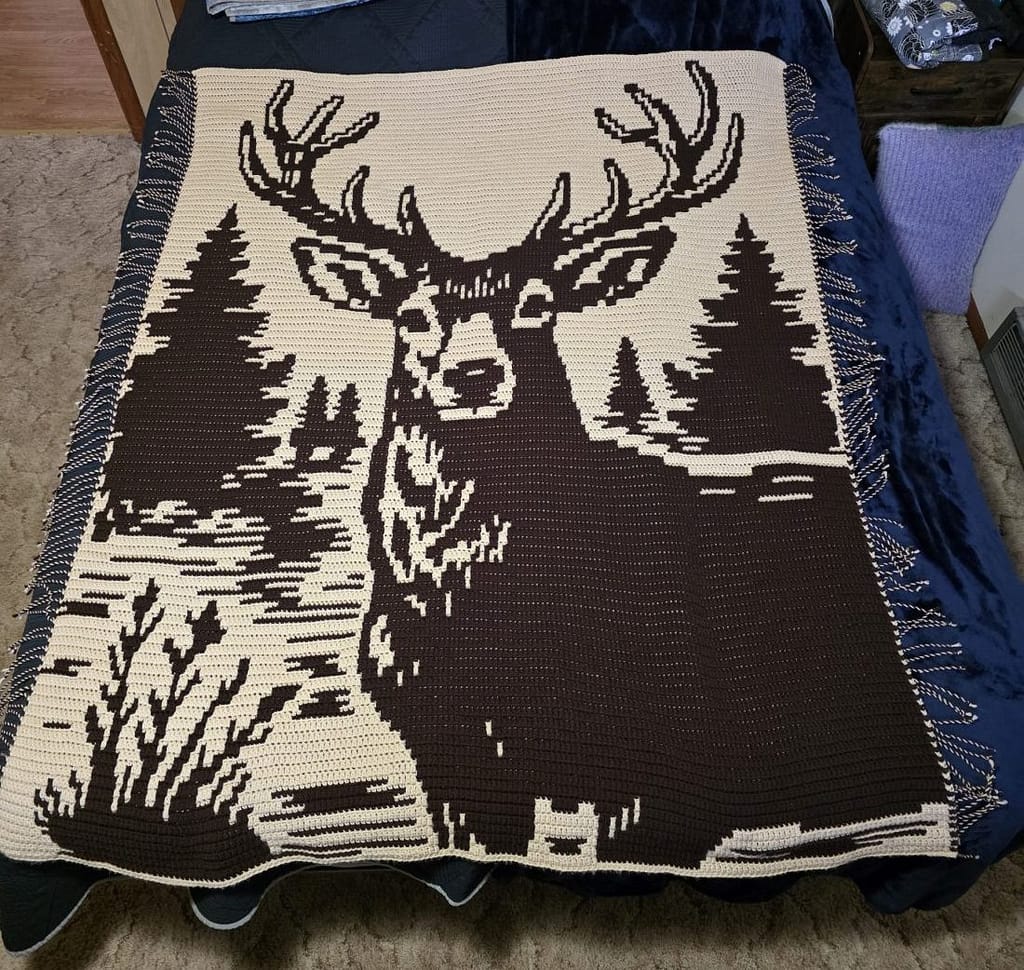
My first two mosaic projects were an owl and a deer pattern. Both were beautiful, both taught me a lot, and somewhere during that very first project something unexpected happened.
Before I had even finished the blanket, I was already imagining designs I wanted to create myself.
Less than a month later, I started designing my own pattern.
Naturally, it had to be geeky.
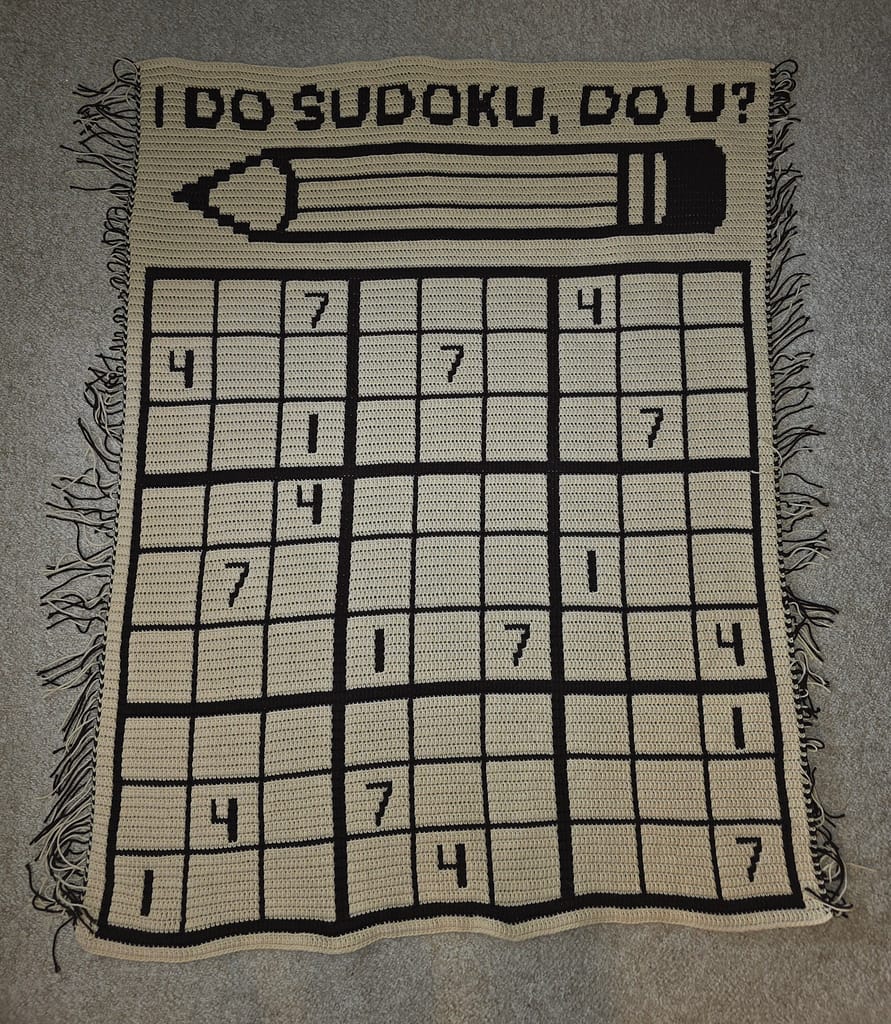
Instead of animals, I started with something that felt more like me: Sudoku.
How Mosaic Overlay Crochet Actually Works
One of the things I love most about mosaic overlay crochet is that the complexity is mostly visual.
The finished project looks intricate, but the process itself is surprisingly approachable.
Each row uses only a single color.
Most patterns alternate between two colors:
- A background color
- A design color
You can absolutely use additional colors if you’d like, but two-color designs are where many crocheters begin.
High contrast is your friend.
The more contrast you have between your background and design color, the more clearly the pattern will appear. My personal preference is a lighter background paired with a dark brown or black design, but I’ve seen gorgeous projects created with all kinds of color combinations.
The magic comes from where the stitches are placed.
Single crochets are worked into the back loop only.
Double crochets are worked into the front loop of a stitch below, effectively laying the stitch over the surface of the fabric.
Those front-loop double crochets are what create the design.
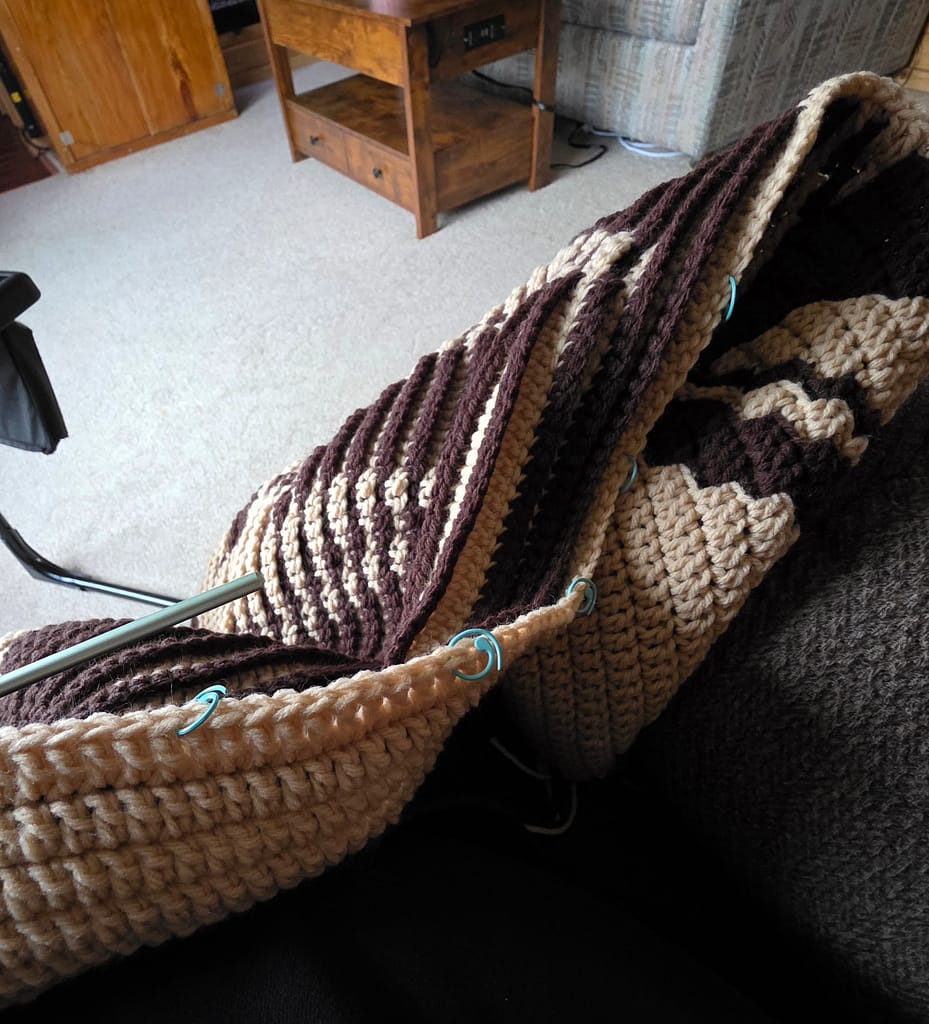
The Secret Back Side
If you’ve never seen the back of a mosaic overlay project, it may surprise you.
The unused stitches create a ribbed texture across the back of the work.
Some crocheters choose to create reversible or “negative” versions of patterns so the back mirrors the front with opposite colors. While those can be beautiful, they also use significantly more yarn and create a much heavier fabric.
I actually love the traditional ribbed back.
It gives the blanket structure while still allowing it to drape nicely.
Mosaic overlay blankets have a wonderful weight to them. They’re the kind of blanket that feels warm the moment you pull it over your lap.
I’m already looking forward to winter evenings spent under my Sudoku afghan working a few puzzles.
What Mosaic Crochet Taught Me About Counting
If mosaic crochet has a hidden skill requirement, it isn’t advanced stitches.
It’s counting.
Lots and lots of counting.
Some rows can easily contain more than 200 stitches.
That’s when stitch markers became one of my favorite crochet tools.
I typically place a marker every ten stitches. That way, if I’m halfway through a long section of double crochets, I don’t have to recount the entire row to figure out where I am.
Instead, I only need to count back to the nearest marker.
It sounds like a small thing, but when you’re spending weeks or even months on a project, small efficiencies add up.
Charts vs. Written Instructions
One thing I’ve learned is that every crocheter processes information differently.
For my Sudoku design, I worked almost entirely from the chart. I could see the pattern visually and understand exactly where each stitch needed to go.
For the owl and deer patterns, however, I relied heavily on the written instructions.
Neither approach is better.
It’s simply a matter of how your brain prefers to interpret the information.
That’s one reason I strongly prefer patterns that include both charts and written instructions whenever possible.
My Unexpected Favorite Tool
Highlighters.
Specifically, Bible highlighters.
Traditional highlighters work perfectly well, but repeatedly uncapping and recapping them throughout a long crochet session gets surprisingly annoying.
Bible highlighters are more like a translucent crayon. They don’t dry out when left uncapped, and they make it easy to mark your place without constantly stopping.
It’s a tiny quality-of-life improvement, but those are often the things that make a hobby more enjoyable.
Advice for Beginners
If you’re just getting started with mosaic overlay crochet, my biggest piece of advice is simple:
Pay attention to stitch placement.
The most common mistake I made early on was placing a double crochet into the wrong stitch.
Because the double crochet reaches down into a previous row, it’s easy to accidentally insert your hook one stitch too far to the left or right.
Using stitch markers helped tremendously while I was learning.
I would move them upward as I worked, creating visual checkpoints that helped me confirm I was placing each stitch correctly.
Eventually I stopped needing them, but they were invaluable in the beginning.
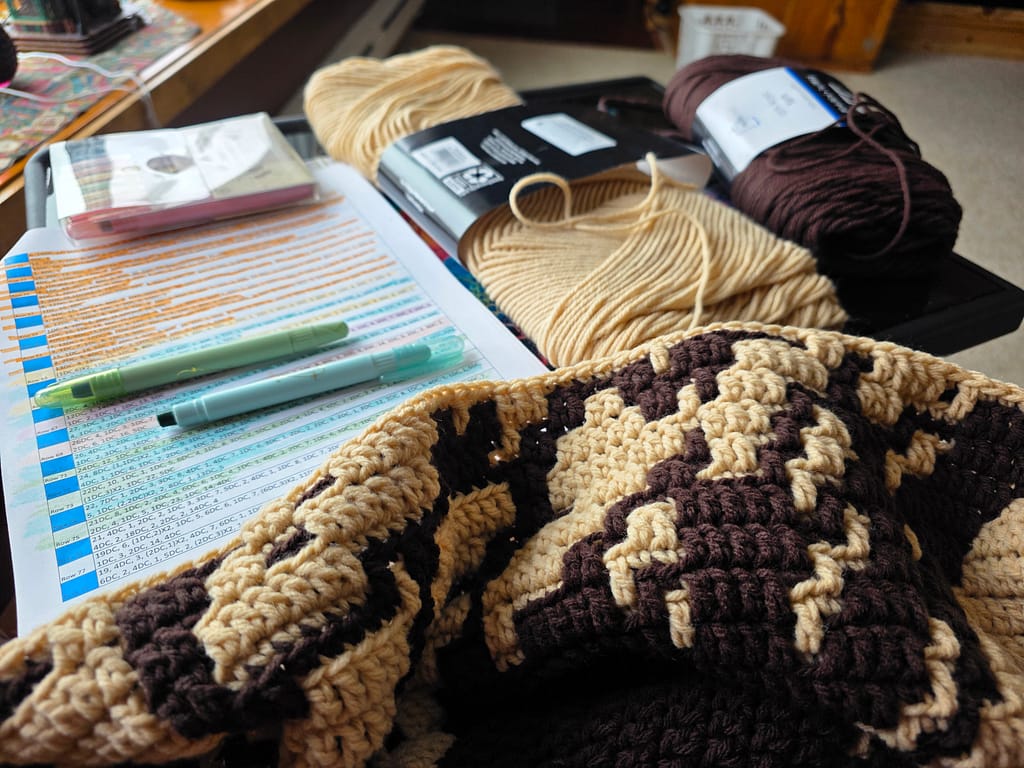
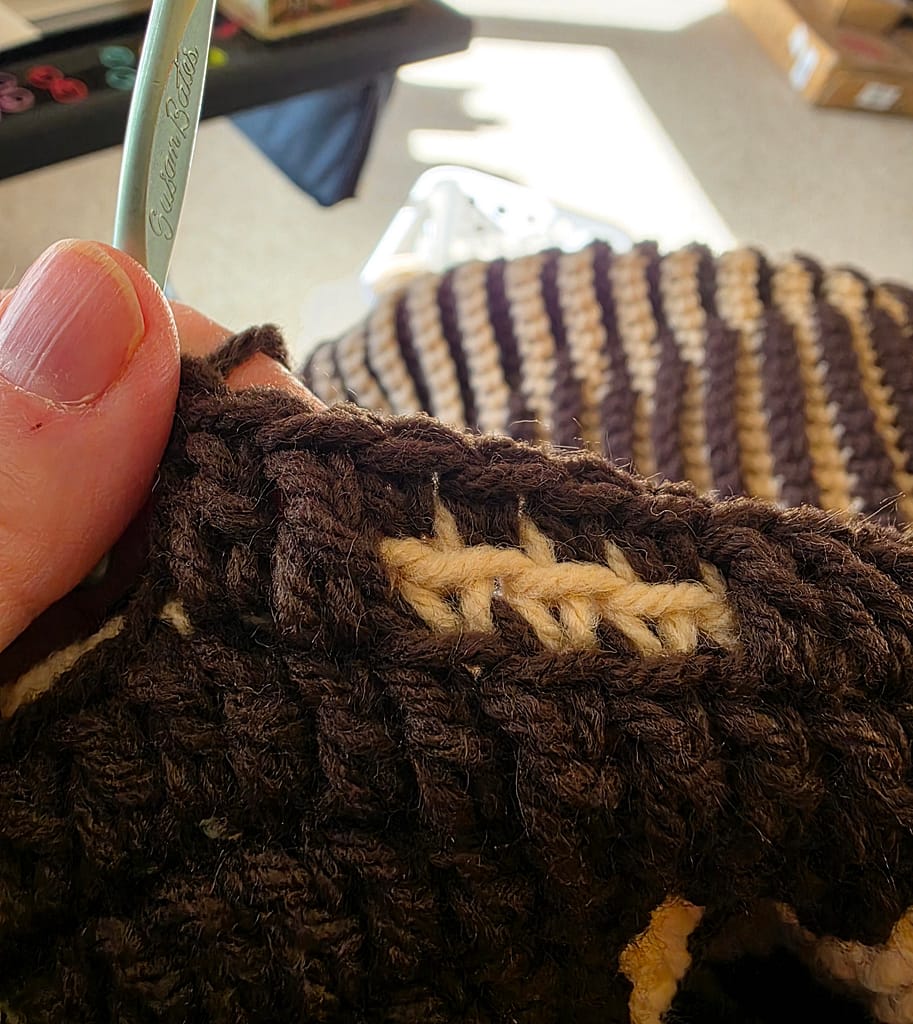
The double crochet stitch in this image is placed one stitch too early. You can see 3 single crochets in buff but 4 single crochets in brown. The first double crochet should be where the second one is placed in this image.
Fringe, Borders, and Finishing Touches
One of the unique aspects of mosaic overlay crochet is that each row begins and ends with a cut yarn tail.
That means you’ll end up with a lot of ends along both sides of your project.
Many crocheters use an envelope border to hide them.
Personally?
I love fringe.
I use my crochet hook as a measuring guide so my tails stay consistent in length. Sometimes I leave them as fringe, and sometimes I twist them using a fringe twister before tying them off.
The finished edge looks beautiful, adds durability, and saves me from weaving in what feels like hundreds of ends.
It’s become one of my favorite parts of the process.
Why I Love Mosaic Overlay Crochet
What surprised me most about mosaic crochet isn’t how beautiful the finished projects are.
It’s how approachable they are.
The technique looks advanced.
The results look impressive.
But underneath all of that are simple stitches, repeated patiently, one row at a time.
It’s a perfect example of something becoming less intimidating once you understand how it works.
If you’ve been admiring mosaic crochet from a distance because it looks too difficult, I encourage you to give it a try.
You may discover, as I did, that those seemingly complicated patterns are built from skills you already have.
And if you’d like a gentle place to start, I’ll be sharing a few beginner-friendly mosaic patterns here in the future.
Who knows?
You might find yourself designing your own before you’ve even finished your first blanket.